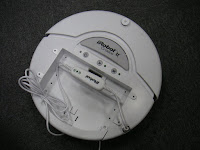
To control iRobot Create, you can use "iRobot Create Open Interface (OI)". iRobot Create has two electronic interface - 7 pin MINI-DIN connector and DB-25 connector to send OI commands. iRobot Create + Sun SPOT demo utilizes 7 pin MINI-DIN to control iRobot Create. Here, let's try some basic OI commands with this built-in serial connection.
Before proceeding, you need to have a serial terminal on your computer (You can download "Realterm" from iRobot Create site if you don't have any one. Realterm is a terminal officially recommended by iRobot).
iRobot Create kit includes a serial cable to 7 pin MINI-DIN and software drivers. To use Realterm (or other terminals), you must remember the serial COM port number to iRobot (on Windows, you can check it from device manager -> port).

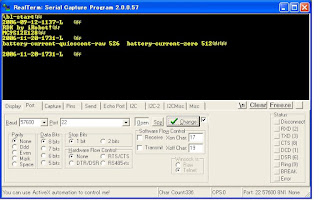
After connecting to iRobot, launch Realterm on your computer and go to "Port" tab. Set Baud = 57600 and port number you checked above. Then click "Change" button (without this, your change won't be properly reflected). You can verify the connection by checking that the following output appears on Realterm when powering on iRobot. If you don't, please check if the port number is set correctly.

Each Open Interface command is very simple. Just one byte "Opcode" + some data bytes (0 or more). For example, to turn on iRobot Create's Play LED (which is near ">" button), send
128 132 139 2 0 0
This means
- 128 (Opcode) = starts the OI
- 132 (Opcode) = puts the OI Full mode
- 139 (Opcode) = controls LEDs
- 2 0 0 (Opcode 139's data bytes) = the first byte indicates which LED you use ("2" = Play LED, "8" = Advance LED (near ">>|" button) or "10" = both of them). the second byte means LED color (0 = green, 255 = red) and the third byte means LED intensity.

No comments:
Post a Comment